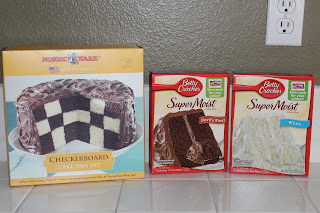
A year ago this month I received an awesome gift, a checker board cake pan set, before this cake I had only tried it once. So last week, I "dusted" it off and get to work. I took the lazy route though and used boxes of cake mix to complete this project.
First things first, make sure you have everything you need!
Insert the divider into the pan and decide how you want to cake too look, you will have two layers that are patterned the same way.
Fill your cake plans according to the plan, starting with the center, be careful not to let it drip into the center section too much!
After you have completely filled you pan remove the insert carefully. Repeat this process until all 3 of your pans look something like this...
Bake your cakes according to the directions on the box. Lightly frost between the layers of the cake, and frost the outside as you normally would. I chose a homemade chocolate buttercream because its delicious!
When your through, enjoy the beauty of your cake!
This is a really simple and fun way to impress people. The hardest part really is filling the pan! I ended up pouring my batter into measuring cups with a pour spout.
-Courtney
P.S. I totally tried to make my white cake pink by using a bit of red food coloring. It would have turned out better if I'd have used pink, however my dog decided to eat my pink food coloring right before I used it.


So cool Courtney! That's a fun cake.
ReplyDeleteI never knew how that was done..
ReplyDeleteCan't wait for your next post.
ReplyDeleteHey Picky Eater! I've been a bit unfocused lately but I am actually working on my next post this evening!
Delete